Carrier Thermostat Complete Troubleshooting Guide
A malfunctioning thermostat can be extremely problematic, especially during those frigid cold months or those searing hot days when heating and/or air conditioning is so essential. Carrier has been a household name in home electronics for decades.
The company further offers a range of thermostats from the most basic models to premium programmable thermostats, so it is therefore very probable that your thermostat problems are concerning a Carrier thermostat. Luckily, however, most of these thermostat problems are easily fixed by the average homeowner, as we will demonstrate in this Carrier thermostat troubleshooting.
These recommended solutions and proper thermostat care procedures are recommended to be attempted before burdening Carrier Customer support with your technical issues or hiring an expensive professional. Most of the issues with the thermostat are quite straightforward and with a fix that is just as easy.
Also, ensure that the thermostat is located not too high or too low on the wall, and is not in contact with direct sunlight or draught that might interfere with the normal thermostat operations. If this condition is met, and the switches are in their correct positions but the thermostat is still acting up, proceed with the following recommended solutions.
How to Reset Carrier Thermostats
You may have in the recent past installed a new filter or a humidifier and the Carrier programmable thermostat doesn’t read accurately. Or perhaps after routine maintenance, the thermostat starts acting finicky. If this is the case, you should attempt a reset of the thermostat by following the steps below:
- Press and Hold the ‘Left’ button until the ‘Accessory Status’ screen appears.
- Use the scroll button until the accessory you wish to reset is highlighted.
- Select the setting using the ‘Right’ button.
- Finally, exit to the homepage by pressing the ‘Left’ button.
That’s it! Check if the issue plaguing your thermostat is resolved after these steps.
READ ALSO: Robertshaw Thermostat Starting and Troubleshooting Guide
How to Change Carrier Thermostat Battery
This is one of the most fundamental Carrier thermostat troubleshooting procedures every homeowner should be aware of. However, not all thermostats require batteries and therefore confirming beforehand if your model does use them could save everyone involved some precious few minutes.
Most programmable thermostats will flash a low battery warning when the batteries are about to die, and at this point, your precious thermostat can no longer control the HVAC system. The batteries will need replacing, and while the steps may vary depending on the model of the thermostat (consult your manual), the general procedure is outlined as follows:
- Pull the thermostat housing off its wall-mount plate. If it doesn’t come right off, try sliding it up on the wall-mount and then off, or look for a latch to press somewhere on the face-plate.
- Turn the face-plate over to find the battery slots. Most thermostats use either AA or AAA alkaline batteries but some may also use a 3V button-style lithium cell as well.
- Pry the batteries out carefully and replace them with similar fresh ones, making sure to align the positive and negative terminals correctly.
- Set the face-plate onto the wall-plate with the pins on the back aligned with the terminal screw block. Snap it back to place and you are done.
NOTE: Do not install leaking or damaged batteries as they might corrode the thermostat’s internals. Also, rechargeable batteries are not recommended due to improper voltages.
Carrier Thermostat Wiring
With some very few exceptions, a majority of thermostats are wired the same way. This wiring is standardized so the average homeowner can install a thermostat that controls a single zone. This also means that, when the need arises, he can troubleshoot his Carrier thermostat’s wiring problems.
Standardized wire colors are important in HVAC systems and hence thermostat and controller manufacturers design their products to conform. In a Carrier thermostat, you will most likely find a White (W), Yellow (Y), Green (G), and two Red (Rh and Rc) terminals.
There might be a C terminal for the common wire that provides a return path to the transformer so that electricity can power the thermostat’s display and programming features. This wire is usually black or blue.
Assuming that your wires and color-coded using the standard form, you should confirm the following connections for a single-zone heat pump and cooler. If you have a multi-zone setup, you might be better off calling a technician because you might be overwhelmed and do more harm than good:
- The black/blue wire goes to C. This provides power for the internal circuitry of the thermostat
- White wire goes to W, which switches the heater on and off.
- Yellow wire goes to Y. This controls the compressor that runs the cooling system.
- Red wire goes to Rh or Rc, with the two terminals usually bonded. This controls the main power switch for the heater and cooler.
- Green wire goes to G and controls the fan
- Blue wire goes to B and controls the reversing valve that turns the heating pump into a cooling pump.
- Orange wire goes to O and controls the reversing valve that turns the cooling pump into a heating pump.
Other colors of blocks and wires are probably for second-level functionality and therefore, you might be better off consulting a technician, or your owner’s manual religiously.
Carrier Thermostat Not Powering on or Control Panel Not Working
This is probably one of the most alarming yet more common thermostat problems. It is a significant source of concern for a majority of homeowners and with good reason; so many issues with the thermostat can contribute to the unit not powering on. These issues may range from simple configuring problems to a failure of the unit. However, the following are more of the common Carrier thermostat troubleshooting steps for some problems:
- Replace the batteries. You might have missed the low-battery signs on your thermostat, or maybe the warnings didn’t come on. Nevertheless, before panicking, try to replace the batteries (if your model has them) and see if this fixes the issue. The steps to doing this are covered earlier on.
- If the thermostat runs directly from the mains supply, check on the circuit breakers. It is probable that one of them may have tripped and cut off power to your Carrier thermostat. Reset the breakers and see if this restores power to the thermostat.
- Check the wiring. Confirm that the various wires are firmly into their terminals and that the exposed ends are not corroded. The color-coded terminals are discussed earlier on. Check if this fixes the unresponsive thermostat.
If these steps are carried out and the thermostat is still unresponsive, then the issue might be technical and you should consider consulting before replacing the unit.
How to Unlock a Carrier Thermostat
Locking your thermostat prevents children and others in the home from turning up the heat to absurd levels and running up the bill. This also prevents accidental changes to the settings and other options available via the control panel. To unlock your Carrier thermostat, however, may be due to an accidental lock, just follow the steps below:
- Press and hold the ‘Mode’ button
- Simultaneously press the ‘Up’ and ‘Down’ arrow buttons, and wait for a second
- The locked icon should disappear from the screen and you can use the thermostat normally.
READ ALSO: Aprilaire Thermostat Troubleshooting Guide
How to Program a Carrier Thermostat
Programmable thermostats offer additional convenience by allowing you to set daily/weekly Heating and Cooling schedules. This ensures that your home is always cozy and the temperature just perfect without requiring you to lift a finger to change the thermostat.
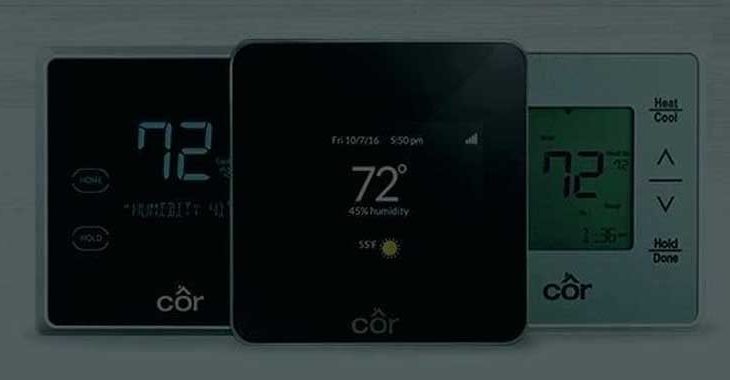
The Cor, Comfort, Performance and Infinity series of programmable thermostats from Carrier can all be programmed in daily and weekly schedules. Of course, the programming details will vary between the models but the general procedure is outlined as follows:
- Repeatedly press the ‘Set’ button until ‘Daily Schedule’ appears on the screen with a list of days of the week on the right.
- Press the button under ‘days of the week’ to select the day you want to program.
- Set the ‘wake’ time by pressing the corresponding button to the hour or a minute and then adjusting with the up and down arrows.
- Next, choose the ‘heat set at’ or ‘cooling set at’ button as needed and set the temperature using the up and down arrows.
- Program the three other time periods under ‘Day’, ‘Evening’ and ‘Sleep’ by choosing the corresponding button and repeating step 4.
- Use the ‘days of the week’ button to navigate to another day and use the same steps to program the heating and cooling for the day.
- When finished, press ‘Done’ and that’s it.
Hopefully, this comprehensive Carrier thermostat troubleshooting guide has been helpful in solving your particular thermostat issues. If you still need help, it is prudent to call an HVAC technician rather than attempt an overly complicated and sometimes dangerous procedure. However, for more pieces featuring some critical home and living tips and tricks, check out some of our other articles on the site.