Best Way to Clean Textured Vinyl Flooring
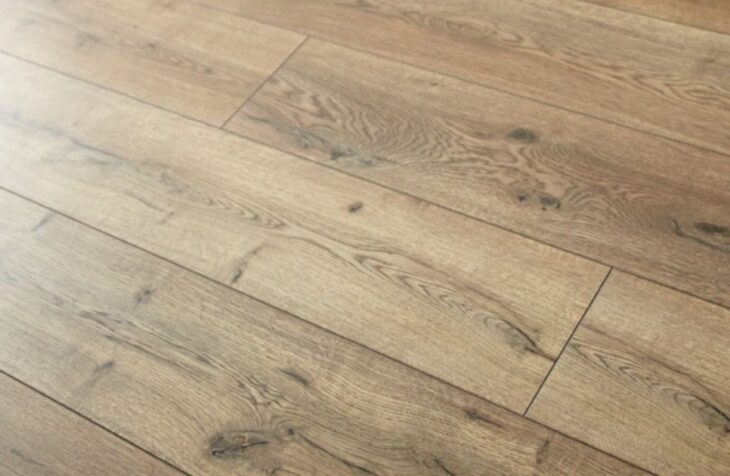
The textured vinyl floors are one of the most popular flooring choices for a limited budget and the maintenance of efficiency. These floors are non-recyclable but have good longevity.
More often than not, people find reliance on these floorings. This is because they have the waterproofing feature, and the cleaning procedure here is way too straightforward than the other floors.
Besides, the floor’s core gets adequately cushioned, which makes the beds very comfortable to work on.
However, cleanliness is an essential process for maintaining the floorings of our houses and offices.
A common challenge concerning textured vinyl flooring relates to dirt. A pitted textured floor is more susceptible to grease, mud, and additional bits of unwanted particles remaining on your flooring after cleaning (compared to other styles).
Textured flooring has an irregular floor surface, making it easy for contaminants to remain embedded within your vinyl floor surface and cause it to lose its sheen and affect its overall appearance.
Some attempt to solve the problem by waxing over the surface, making matters worse. However, you can use several techniques to clean up your vinyl flooring easily and with a remarkable success rate.
If you are looking for an ideal way of cleaning your textured vinyl flooring, here’s what you should do:
How To Clean Vinyl Floors.
- Sweep Before You Mop
Vinyl is very durable, but the smooth surface is prone to scratching, leaving the floor looking undesirable. Avoid leaving graze marks by first sweeping before mopping.
Use a soft-bristled broom or, even better, a dry mop to sweep away dust, debris, and hair. Be sure to sweep around furniture legs and underneath the furniture. Any hidden debris that gets blown out onto high-traffic areas can cause subtle scratching noticeable with time.
Once you have dust-free floors, you can go ahead and mop. Plain warm water and a mop are all you need if your floors are stain-free and generally well-maintained.
- Cut Grease With A Dishwashing Soap
Mix warm water and drops of dishing soap to clean the kitchen floor. Dishwashing soap will cut through the splatters of oil and grease in a busy kitchen.
Avoid scouring powders and products containing ammonia, as these might be too harsh for vinyl flooring. Instead, opt for a gentle soap that will neither damage nor tarnish the floor with an unsightly film.
- Use Apple Cider Vinegar To Remove Grime
Apple cider vinegar is a powerful but gentle cleanser. The acid lifts and loosens grime, making it easy to clean high traffic spots such as the entryway and kitchen, prone to getting dirty. Also, unlike soap, cider does not leave unsightly buildup marks.
Pour one cup of apple cider vinegar into a mopping bucket containing one gallon of warm water. As you mop, apply slight pressure on those filthy spots. Keep the mop clean by regularly rinsing with clean, warm water.
- Get Rid Of Stubborn Stains Using Baking Powder
Spills should be cleaned immediately to avoid permanently staining the floor. Remove stubborn stains from sauces and juices by applying baking soda paste to the area. Rub gently but steadily until the stain lifts. Mop the spot using warm water and a bit of white vinegar to remove baking soda residue.
- Clean Inks Using Alcohol
Stains from marker pens, crayons, lipstick, ink, and dyes can be tough to eliminate with plain water and liquid soap. Instead, you need a more powerful cleanser such as an alcohol solvent to lift the stain.
Using a rough item such as steel wool to scrub the stain out might be tempting, but this will cause irreversible damage to your vinyl floors.
The best option is to use a soft-bristled brush plus the alcohol solvent. Use the brush to apply a bit of the solvent and scrub the stained area gently.
- Get Rid Of Scuff Marks Using WD-40
Scratch marks on your floor are unsightly. Anything from furniture, shoes, and pet paws to kids playing can leave scuff marks on the floor. Restore the sheen on your floors using WD-40.
Spray the WD-40 cleaner on a soft towel and use it to wipe the affected area. Once you get done, clean up the WD-40 residue using water and white vinegar.
- Limit The Amount Of Water You Put On The Floor
Vinyl is waterproof, but this doesn’t mean that it is indestructible. Water can seep in through the plank joints and cause irreversible damage. If this happens, you will get forced to replace the affected planks. If the damage extends too far, you might have to return all or a portion of the floor.
Avoid costly damage to your floor by drying water spills as soon as they happen. Also, when mopping, be sure to wring out excess water as you go along.
- Be Diligent With Your Stain Removal Technique
There is a right and wrong way to clean stains. The right way is to start by cleaning the outer edges of the stain as you work your way toward the center. Then, keep using a clean part of the cloth to prevent the stain from spreading and growing bigger.
- Rinse Your Floor
Rinsing helps remove extra soap to avoid leaving a dull film on the floor. It might not be necessary if you have only used a moderate amount of soap. But, if your foot still feels sticky after that first mop, it is a good idea to give it a quick rinse. Mix water with one cup of white vinegar in a bucket and mop the floor to leave it super clean.
- Let The Floors Air Dry
If possible, open the windows to let in air to dry the floors. Try as much as possible to stay away from the just-cleaned floors to avoid leaving footprints and creating a general mess.
How To Prevent Dirt On Textured Vinyl Floors.
Cleaning your vinyl flooring should always be a last resort. It’s better to take precautions to prevent dirt and other impurities from affecting the quality of your floor surface.
- Sweep frequently
The key to keeping any floor in good shape is to keep it clean, and sheet vinyl is no exception. Get the dirt off before it gets ground in, and your vinyl will last longer. It’s a good idea to get in the habit of quickly running a soft broom across the kitchen floor every evening after you put the dishes in the dishwasher.
- Shampoo away hair spray
Shampoo works as an excellent vinyl floor cleaner. If you have hairspray buildup on your vinyl floor, just shampoo it away. It works on your hair, doesn’t it? Mix a squirt of shampoo with a gallon of warm water. Mop, then rinse with a damp mop.
- Learn low-impact cleaning techniques
Resist the temptation to blast away dirt with heavy-duty cleaners. Instead, learn how to clean vinyl floors using the mildest possible method.
Sweep or vacuum it every evening, and wipe up spills right away. Use a mop dampened with warm- not hot- water to clean dirt that the broom or vacuum can’t get.
If all else fails, use soap, but make sure the soap gets designed for your flooring.
- Use the right cleanser.
Here’s how to clean vinyl floors made with no-wax vinyl: Wash them with a cleaner made specifically for no-wax floors, following the directions on the container. If you have older vinyl that requires waxing, clean it with warm water and detergent.
Dampen a mop or sponge with the mixture, and rub the floor just enough to loosen the dirt. Try not to rub off the wax because you’ll have to reapply it. Instead, rinse with clean, cool water—no matter what the soap label says about not needing rinsing—otherwise, you’ll leave a residue on the floor.
Look out for these other cleaning mistakes that only make your home dirtier.
- Don’t drench your vinyl.
It’s important to remember that water isn’t always the best vinyl floor cleaner. Water from an overly wet mop will work its way into the cracks, seams, and edges. Once there, it can destroy the glue bond that holds down the vinyl, causing it to come loose or corners to curl.
- Rinse well to remove all soap
Soap may work as an excellent vinyl floor cleaner, but soap scum leaves a film that collects dirt. So until your floor needs a serious cleaning, stick to damp mopping with just water. When you need to wash the floor, use two mops—one for washing and a second one for rinsing.
- Preserve the sheen
“No wax” really means “Don’t wax.” No-wax vinyl has a clear polyurethane coating that makes it shine. Wax won’t adhere well to the layer and will leave a mess you’ll have to strip off. (Don’t use mop-and-wax products, either.) If your no-wax floor loses its shine, restore it with a polish or sealant made for no-wax flooring. Ensure the floor is thoroughly clean, and apply one or two thin layers as directed. It should keep your floor shining for at least a year with only routine damp mopping. If you have an older base that requires waxing, wax when it loses its sheen, but use only the amount called for on the container label. Check out these 16 cleaning hacks you’ll want to steal from professional house cleaners.
- Outfit your furniture and large appliances with protective “feet.”
The weight of heavy items (such as tables and refrigerators) that occupy permanent places in your kitchen can dent vinyl flooring. Prevent these dents by fitting your furniture with floor protectors, which you can find at hardware stores and home improvement centers.
- Forgo rolling casters
These, too, can damage the surface of your tile. Instead, consider fitting chairs with felt tips, which won’t harm your vinyl.
- Before enormous moves, put appliances and other heavy items on a plywood path.
More often than not, when we replace or move appliances, we drag or push them across the floor rather than lift them—but dragging them will only scratch and scuff your vinyl flooring. So instead, to keep your vinyl in tiptop condition, lay a piece of plywood sheeting along the route you will take out of the room and push or “walk” the appliances along the plywood path.