Honeywell Home T9 Smart Thermostat Troubleshooting and FAQs
The Honeywell Home T9 thermostat is a good choice for smart temperature control in the rooms you care about most. It has some impressive features like a color graphical LCD touchscreen display, 7-day scheduling, 200 ft sensor range and others. It works with Alexa, Samsung SmartThings, Google Assistant and more. If you have any problems with your T9 or are experiencing some challenges setting it up, here is an easy-to-follow troubleshooting guide. We have also provided answers to some of the frequently asked questions on this unit.
Does Honeywell Home T9 have a Backup Battery?
Honeywell Home T9 doesn’t have a backup battery. However, it has a chip that saves all programs and installer set up functions in case of a power outage. It uses a supercapacitor for short term retention of the clock. If the power outage lasts for long and if the thermostat is connected to the internet, it will automatically resynchronize with the internet time when power is restored.
Honeywell Home Unable to Find T9 Fix
If you are getting the “Unable to find thermostat” message on your Honeywell Home App, it could be that you are not connected to the same network. The thermostat must be connected to the same Wi-Fi network as the mobile device you are connecting it with. “Forget other Wi-Fi networks on your mobile device. Routers or mobile devices that block UPnP may also block the connection that takes place during this step in the setup process. Check with your local ISP to enable this service on your router.
Does Honeywell T9 Need C Wire?
The T9 thermostat requires a common (C) wire. You will need at least 3 wires going to the thermostat. A C- wire provides Wi-Fi thermostats continuous power by connecting it to a heating and cooling system. If you are installing a new thermostat, but your existing one doesn’t have a C-wire, you have the following options:
- Check for an unused C-wire
- Use a C-wire adapter
- Check if your system is heat-only or RedLINK
A C- wire adapter may be included in your thermostats, if otherwise you can purchase it separately. It replaces the need for a C-wire.
How to Check for Unused C-Wire
Some homes have an unused C-wire hidden in the wall. To check:
- Turn off power at the breaker box or switch that controls your heating and cooling equipment.
- Remove your existing thermostat from the wall plate, but don’t remove any wires from your thermostat at this time.
- Check if you have a line voltage system. Line voltage systems have thick, black wires with wire nuts, or are labeled high voltage (120V or higher). If yes, your system may not be compatible and you may need to find a pro-installer in your area.
- If it’s not a line voltage system, proceed to take a picture of your existing wall plate’s wiring. You may need the picture as reference later.
- Then, remove any jumpers. These are used to connect two terminals and may look like a small staple or colored wire.
- Label each wire on your existing wall plate with the stickers provided with your new thermostat. You can use a tape and a pen if you don’t have stickers.
- Check the boxes and write down the color of the wires connected to the terminals in the existing wall plate.
- Disconnect the wires and remove the existing wall plate.
- Look at the thermostat wiring checklist if the C-terminal is checked. Alternatively, you can look at the picture you took earlier if there’s a wire in the C-terminal. If yes, this means your system is using a C-wire and you don’t need to install a C-wire adapter.
- If no, your thermostat isn’t using a C-wire.
- Look at the bundles of wires coming from the wall to see if you have an unused C-wire. You can use this unused C-wire if it’s there. If not, you need to use a C-wire adapter.
- Label your unused C-wire with the “C” sticker provided with your new thermostat.
- Remove cover from furnace or heating system to find the control board.
- Find the other end of the unused wire. It should be the same color as the one near your existing thermostat.
- Connect the unused wire to the C-terminal in the control board and then close the cover to the furnace or heating system.
How to Use the Honeywell T9 C-Wire Adapter
- From the wires you had labeled of your existing wall plate, look and make sure you have both a G and Y labeled. If yes, it means your system is compatible with the C-wire adapter.
- Re-label your G-wire to “C”.
- Re-label your Y-wire to “K”.
- Remove cover from furnace or heating system.
- Take a picture of the control panel wiring for reference.
- Label G, C, R, W or W1 (not in all systems) and Y or Y1 with the provided stickers. Then, disconnect the labeled wires.
- Connect labeled wires to the C-wire adapter. On the C-wire adapter’s “Thermostat” side, press down a tab to open the corresponding terminal. Then insert the labeled wires. Note that this will convert G into C, and Y into K.
- Connect C-wire adapter to control board.
- Mount C-wire adapter using the included mount and adhesive pad.
- Close the cover to the furnace or heating system.
What is the Difference Between Honeywell T9 and T10
The installation of a Honeywell T9 can be a simple DIY as the thermostat can configure itself with its wire-sensing technology and includes a C-wire adapter. The T10 requires professional installation due to its humidity and ventilation.
How to Connect Honeywell T9 to Smartphone App
Honeywell Home app lets you to monitor and control your thermostat anytime from anywhere, for total comfort.
- Make sure your thermostat is connected to Wi-Fi
- Download the Honeywell Home app for your device and create an account. Its available in Apple store for iOS and Google Play for Android devices.
- Launch Home app and choose add new device from the home screen.
- Choose T9 from the list of options.
- The app will then start to look for your thermostat, ask you to create a home, including assigning it a name and giving your address.
- The app will ask various questions about your preferred temperature settings and give you the option to enable geofencing. You can customize the home/away mode geofencing radius in the Honeywell Home app.
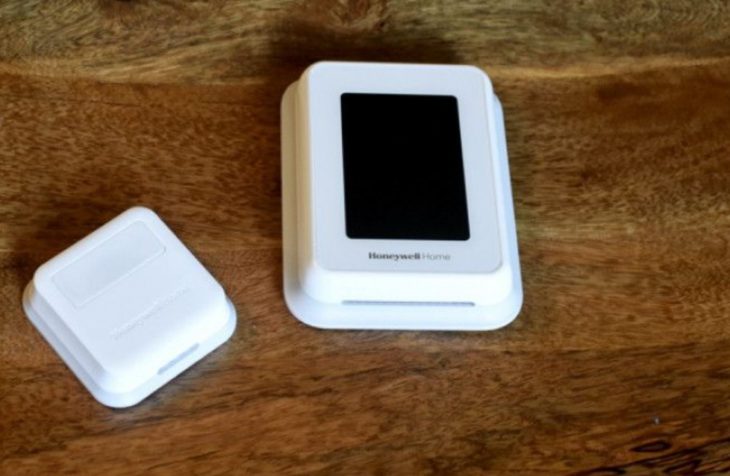
How to Configure Honeywell Home T9 Remote Sensors
A remote sensor is a device designed to enable the thermostat to control room temperature based on the occupancy and temperature levels of the room. One T9 remote sensor comes in the box, and additional units can be purchased in pairs. You can link up to 20 remote sensors to one T9 thermostat and program it based on what they are reading.
To add a remote sensor:
- Touch any part on the display to wake the thermostat.
- Touch the MENU icon at the bottom of the screen.
- Scroll down and touch “Devices and Sensors”.
- Touch “Add”.
- Follow the on-screen directions to pair and name your new sensor.
To check the status of a sensor,
- Touch any part of the display to wake the thermostat.
- Touch the MENU icon at the bottom of the screen.
- Scroll down and touch “Devices and Sensors”.
- View the sensors, add a sensor or identify a sensor.
- To identify a sensor, touch “identify” and then remove the cover from a sensor and press the button on that sensor. The thermostat will identify the room name of that sensor.
- Touch a sensor name from the list to get sensor information.
- Touch Motion Sensitivity to adjust setting.
- Touch “Blink lights” to make the light on the selected sensor flash for 5 seconds.
You can check out more informative pieces on other Honeywell products here.