Lennox iComfort Thermostat Troubleshooting
Lennox iComfort smart thermostats are designed to help users get the best performance from their heating and cooling equipment.
They are compatible with a dedicated app that allows for control of settings via mobile devices. Before you call a technician for some troubles you are having with your thermostat, there are several troubleshooting measures you can try out to see if it clears out.
Sometimes it may not be a big deal, plus it saves you money.
How Do I Reset My Lennox iComfort Thermostat?
Follow these steps to reset your Lennox thermostat:
- From the home screen, touch the Lennox logo and hold for 5 seconds.
- A message screen stating “qualified Lennox equipment installers only” warning screen will appear.
- Touch the “reset” button. The thermostat will reboot itself. The screen will go blank for about three seconds. Then, the home screen will appear.
Why is My Lennox Thermostat Blank?
If your thermostat is blank, the first probable cause you should check is whether the batteries in the unit need to be changed. They may have run out of charge to power the thermostat. If your thermostat uses the home electrical system, you should check on the circuit breakers. One of them might have tripped and will need to be reset.
How Do I Unlock My iComfort Thermostat?
There are three screen locking options;
- Default is unlocked, where you can make changes to any settings.
- Partially unlocked, where the screen is locked but temperature settings can be changed.
- Locked, where no changes can be made.
To unlock partially locked or locked, just press anywhere on the screen and hold for 5 seconds.
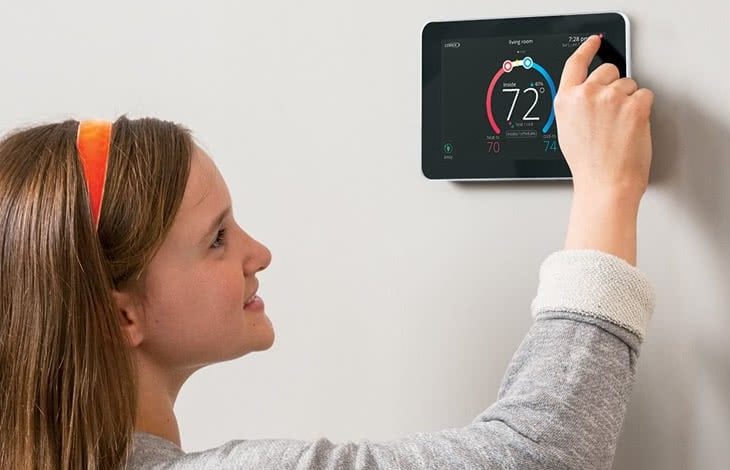
How Do You Adjust a Lennox Thermostat?
Setting Time and Date
To input time and date information;
- Use the arrows to highlight that variable and then use “modify” to proceed to “Time and Date”.
- When “Time and Date” appears, enter the correct date by pressing one of the time and date boxes.
- Press the up/down arrows to change the data.
- Press other boxes and adjust with arrows for all time and date information.
- Press “save” to save the changes and return to “User setting selection screen”.
- When you’ve completed the user preferences, press “done”.
Temperature
Temperature changes can be made from the HOME screen anytime if the user wishes. To adjust if the program is not on;
- Press the up or down arrow until the “heat to” or “cool to” number is at the desired temperature.
- The setting will remain until you decide to change it again.
To adjust temperatures when the program is ON;
- Press the up or down arrow until the “heat to” or “cool to” number is at the desired temperature.
- While doing so, the set hold menu appears, giving a list of options you can choose.
- After a hold is set, the set hold options and buttons will disappear and a message will state when the hold expires. There is also a cancel option should you opt to revert back to the program.
In addition to making temperature adjustments, you can also make other changes to how your system works;
- From the HOME screen, press the screen near press for more.
- The indoor settings screen opens.
- Here, you can make temperature changes or select other system or fan settings. Use either of the select buttons to scroll through the available options.
- Pressing either arrow key brings up the set hold menu.
Humidity
To adjust humidity controls:
- Select the indoor humidity tab.
- Use “select” to tell the system which humidity control you want to address
- Use “switch” to change which operation you want to adjust.
Does My Lennox Thermostat Have Batteries?
Not all thermostat models require batteries. Those with a battery can be removed from the wall plate during the program. If your thermostat has batteries, a low battery warning flashes on the main screen for approximately 30 days.
How to Replace Lennox Thermostat Batteries
Replace the batteries as follows:
- Remove the thermostat from the base by pulling it straight out.
- Install 3 new AAA alkaline batteries with proper polarization. All programming information is retained during battery replacement.
- Then, place the thermostat back on its base by aligning the terminal screw blocks with the pins on the back of your thermostat.
- Push the thermostat straight onto the base.
How to Connect to a New WiFi Network
The thermostat can connect to a home wireless router that uses up to 32 characters in the access point name. To connect to a new network:
- Slide the option to ON to enable Wi-Fi.
- Wi-Fi network will show not connected. Press on not connected.
- If the access point is visible, select your home network from the list of detected networks displayed to be within range.
- If the access point is hidden, select other and proceed to the next step.
- “Enter new network information” will be displayed on the screen. Enter the name of the hidden network.
- Select security. The options are WEP, WPA and WPA2. If you home Wi-Fi network is unsecured, then Wi-Fi security must be enabled using one of the options via the router before proceeding.
- Once you have selected the security option, a password field will be displayed. Enter the password to access your home Wi-Fi network.
- Then, press join.
- Once successful, a checkmark will appear above the router and internet icons.
LED Light Codes and Their Meaning
The LEDs in these thermostats have a red and green LED chip in the package and can show red, green, or amber colors, steady or flashing.
- Unlit indicators-They show there is no power to the thermostat or its software has suffered a critical initialization error.
- Steady amber indicators- They show the thermostat boot-up and self-check processes are in progress or have completed.
- Flashing amber Wi-Fi indicator- It shows that the Wi-Fi module check is in progress.
- Steady amber Wi-Fi indicator- It shows that the Wi-Fi module has passed its checks but isn’t connected to the home Wi-Fi network.
- Flashing green indicators- They show acquisition and test of resources across wired interfaces to the Mag-Mount/HD display and to installed HVAC equipment.
- Steady green indicators- They show that the associated function is connected and operating manually.
- Flashing red indicators- They show a problem with the associated function.
- Flashing red ALERT indicator- It shows that there is a critical alert condition. If one of the other indicators is also flashing red then it is the likely source. The source of the alert isn’t defined if no other indicators are flashing red.
The center push button has a red-green-blue LED backlight that indicates the Lennox-managed local network communication status of the Smart Hub. When the Smart Hub is in a normal steady state, the push button backlight shows:
- Steady blue when there is only one Smart Hub in the home and it isn’t connected to a mobile device running iComfort application.
- Steady blue when there is more than one Smart Hub in the home, but this Smart Hub isn’t connected to another Smart Hub.
- Steady blue when the Smart Hub is connected to another Smart Hub in the home through a Lennox-managed local network.
During various Smart Hub transient states, the center push button backlight shows:
- Steady amber (briefly) while the Smart Hub conducts self-tests and boots up.
- Flashing amber when firmware or software updates for the system component.
- Steady blue while Smart Hub conducts checks on its internal Wi-Fi module and HVAC assets.
- Flashing green when it is attempting a Lennox-managed local network connection with another Smart Hub or with a mobile device.
- Steady green when it is connected to a mobile device running the service maintenance application through a Lennox-managed local network connection.
Check this too: Lennox Furnace Troubleshooting Guide & How to Guide
Lennox Thermostat Critical Alert Codes and Troubleshooting
Critical alerts are displayed on the Home screen, on the homeowner alert button, and in the installer alert button. Here are some of the critical alert codes and troubleshooting tips to help clear them.
Alert code 10
The Lennox iComfort thermostat when not in configuration mode has detected an unknown device. Clear the alert code by reconfiguring the system.
-
Troubleshooting tips
- Go to menu> advance settings> view dealer control center> equipment and press reset all equipment. This allows the system to auto-detect any iComfort components attached.
Alert code 11
The thermostat cannot find a previously installed system component. To clear alert code, cycle system power, and if the problem persists then clear by reconfiguring the system.
Troubleshooting tips
-
- Check all system devices connections to make sure they are iComfort compatible.
- Cycle system power.
- Go to menu> advance settings> view dealer control center> equipment and press reset all equipment.
Alert code 12
Thermostat did not find an indoor unit. Make sure there is an iComfort unit on the system. The alert code automatically clears when the system detects the issue is no longer there.
Troubleshooting tips
-
- Check for voltage and missing component.
- Check R, I+, I- and C connections.
- Ohm wires.
- Cycle power
- Go to menu> advance settings> view dealer control center> equipment and press reset all equipment.
- Replace indoor unit control if there’s no response.
Alert code 14
The thermostat found more than one thermostat, indoor or outdoor unit on the system. The code clears automatically when the system detects the issue is resolved.
Troubleshooting tips
- Check wiring and remove duplicate equipment.
- Go to menu> advance settings> view dealer control center> equipment and press “reset all equipment”. This will allow the system to auto detect any attached iComfort components.
Alert code 31
The applicable system component (indoor, equipment interface or damper control module or outdoor unit) hasn’t communicated with thermostat for more than three minutes. Fault clears after communication is restored. If the problem persists, then cycle power.
Troubleshooting Tips
- Check connections and voltages.
- Ohm wires.
Depending on your specific thermostat model, these tips may or may not work for you when addressing the problem. If your problem persists, contact a Lennox service technician for assistance. Also, you can get in touch with Lennox for any other issue you might be having with your thermostat.
Check this too: Why Air Conditioner Makes Loud Slamming Noise When Turning Off