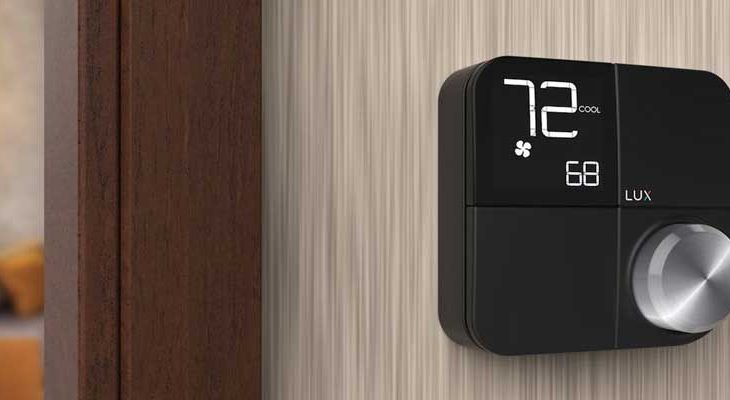
Lux Kono Troubleshooting Guide
If your Lux Kono thermostat is not working, this guide will help you to troubleshoot and fix typical problems.
Whether the thermostat isn’t changing temperatures, doesn’t switch on, or fails to connect to the internet, our Kono thermostat troubleshooting guide will take you through the processes for fixing that particular issue.
If you are new to the LUX Kono, you can check out our review of the thermostat and the features it has on offer.
How to connect Lux thermostat to your Android device
- From your Google play store, download the Lux App
- Press then turn the knob on the Lux thermostat to find the Wi-Fi icon on the screen
- Press the knob to select Wi-Fi “ON”
- Again, turn the Knob for the “And” option for your Android device
- Open the Lux App, go to thermostat list and type the (+) icon at the top of the screen to add a new thermostat
- Open the snap cover of your Kono thermostat to find the Wi-Fi user ID and password
- Return the cover and enjoy managing your Kono from the palm of your hand
How to install the Kono Smart thermostat with a C-Wire
- Unplug your heating and cooling equipment
- Remove the front cover of your old thermostat
- Check for one of following wiring configurations on your old thermostat
- Conventional 1Heat/1Cool – Y, G, W, R, C
- Conventional 2Heat/1 Cool – Y, G, W, W2
- Single-Stage Heat Pump – Y, G, R, O/B, C
- Auxiliary Heat or Dual Fuel Heat Pump – Y, G, R, O/B, W, C
- Choose your wiring system
- Connect each labeled wire with its corresponding terminal by pressing down the lever
- Fasten your KONO Smart to its base
- Return power to your heating and cooling system.
That’s how you hook it up without a C-Wire though you can still opt to use a power extender kit.
How to Install the Kono Smart without a C-Wire
- Unplug your heating and cooling equipment
- Remove the front of your old thermostat from its base
- Check for wiring compatibility on the old thermostat as follows
- Conventional 1 heat/1 cool – Y, G, W, R
- Conventional 2 heat/2 cool – Y, G, W1, W2, R
- Follow the terminal labels on the Lux thermostat base marked Power Bridge.
- Press the lever to insert the wire to the corresponding terminal.
- Connect the Y wire to terminal 1
- Connect the W wire to terminal 2
- Connect the R wire to terminal 3
- Connect the G wire to terminal 4
- Remove the door panel of your furnace to access the control board and transformer.
- Label the four wires from the furnace to your thermostat – Y, G, W & R.
- Disconnect the wires from the control board.
- Open up your Power Bridge casing
- Reconnect the wires that were disconnected from your furnace into the corresponding terminals of the power bridge using the above terminal connections
- Insert the wires from the Power Bridge into the corresponding terminals on your furnace control board.
- You now have a wire going to the C terminal on your furnace.
- Put your panel door back on and return the power back to your heating and cooling system.
How to adjust temperatures on the Kono Smart without a Smartphone
- Press, then turn the knob on the thermostat to select temperature mode
- Turn the knob clockwise to increase the temperature or counterclockwise to reduce the temperature
- Press the knob to set the temperature
How to access Menu Options on the Kono Smart
- Press the knob to get to the menu
- Turn the knob left or right to scroll through the menu
- Press the knob to select a menu option
- Press and hold the knob for 5 seconds to cancel your selection
READ ALSO: Troubleshooting Guides for Nest, Emerson, and Honeywell.
How to connect to Wi-Fi Network on Kono Smart thermostat
- Turn the knob to choose between the Wi-Fi ‘on’ and ‘off’ option
- Press the knob to selection “on”
- Choose the device you need to connect to, either ios or android
Kono Smart thermostat keeps fan always running? How to fix
- Using the knob go to the menu to select the fan mode option
- With “on” selected, the fan will always stay on
- Select auto to run the fan automatically when you need it
- Select IAQ, to periodically run the fan
How to set a Seven Day Schedule on Lux Kono
Before using this method, it is important to note that it only works when you have hooked up a smartphone and you have the smartphone app
- On the LUX app use the “calendar” button to set a heating/cooling schedule
- Select the mode “Schedule” on your Lux thermostat to create a fixed schedule for all days of the week.
Check this too: Lux Kono Thermostat Review – Is It Worth Its Price?
Hopefully, this guide has enabled you to fix issues with your Lux thermostat. If you are encountering any issues that haven’t been covered here, don’t hesitate to let us know. If your thermostat is new and still under warranty, take it to a certified distributor or you might risk voiding your warranty.
