Lux Thermostat Troubleshooting Guide
There is a thin line between a cozy home and a frigid cold or unbearably hot home. This line is more or less policed by your thermostat. Therefore, a majority of the problems with your home’s heating or cooling system can be attributed directly to the thermostat as the culprit.
With Lux thermostats becoming increasingly popular in every market segment; from manual thermostats to programmable ones in a wide variety of price ranges. It is, therefore, not unlikely that many of these malfunctioning thermostats are from the company.
In this article, therefore, we will walk you through some common Lux thermostat troubleshooting steps to get your living situation right again.
Please note that, while this guide will walk you through most of the general issues you may be facing with your Lux thermostat, your best guide will probably be your thermostat’s manual. So consult that manual religiously.
However, we will break down some of that technical language, from the install to some of the more advanced issues, in easy steps to follow along and get you back to cozy living with none of the headaches.
How to Set and Reset a Lux Thermostat
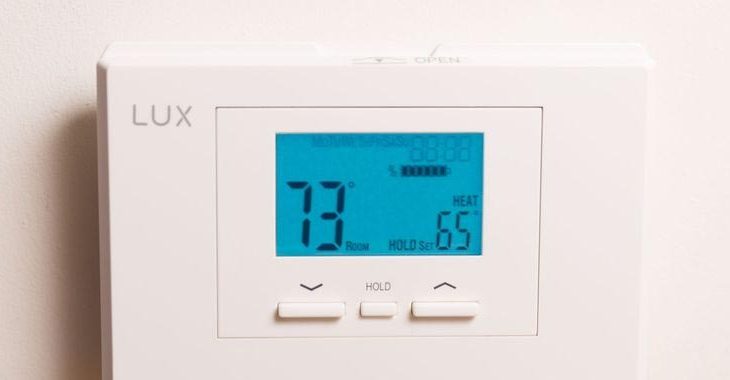
Programmable thermostats such as the Lux HP2110, TX1500, Lux 500 and the Smart Temp 9000 bring energy-saving and highly intuitive features. However, sometimes, the thermostat’s schedule may get out of sync; quickly transforming your cozy home into an intolerable mess. You can follow the steps below to set/reset your Lux thermostat, and therefore reprogram it to the schedule you wish.
- Use a small pointy object such as an open paperclip and press the “Reset” button recessed into a hole in the thermostat unit’s side.
- Next, you’ll need to set the time & date by moving the slide-switch/ dial to the right to the “Day” and “Time” position, until the day flashes on the left-hand corner of the screen.
- Press the up arrow until it reads the correct day and then press “Next” to see the time flashing on the upper right-hand corner of the screen. Set the time in the same way as the day, with correct a.m. and p.m. designations.
 The thermostat will revert to the default temperatures for heat and cool modes. These modes have four designated time slots; morning, day, evening, and night, with a different temperature for each block of time. You can, however, set your programmable thermostat temperatures to your preference, even making a custom schedule for days in the week. Simply follow these steps:
- First, pick the “Cool” or “Heat” mode using the switch. In most models, it’s on the panel’s lower-left corner.
- Move the slide switch on the right to “Temp Program.” You can set the temperatures for weekdays, with the top left corner of the screen displaying all five days, the right-hand corner displaying the time you wish to set morning temperature, and the lower right displaying the temperature itself.
- Use the up and down arrows to adjust the temperature and time. Just press “Next” after setting the time to set the temperature, then “Next” again to set the next time and temperature for the following time slot; “Day”.
- Once you’re done setting the temperature for the four-time periods in each day, you will proceed into Saturday. You may want different temperatures for the weekend. Proceed to set them in the same fashion.
- You can review your changes by cycling through them with the “Next” button
- Once you’re satisfied, set the slide-switch on the right to “Run”
Lux Thermostat Not Turning on Heat
Your Lux thermostat is undoubtedly an invaluable part of your central heating system. It is a major feature, therefore, that the thermostat activates and deactivates your heating system as required. Should it fail to do so, however, you can follow this Lux thermostat troubleshooting procedure to try and resolve your issue:
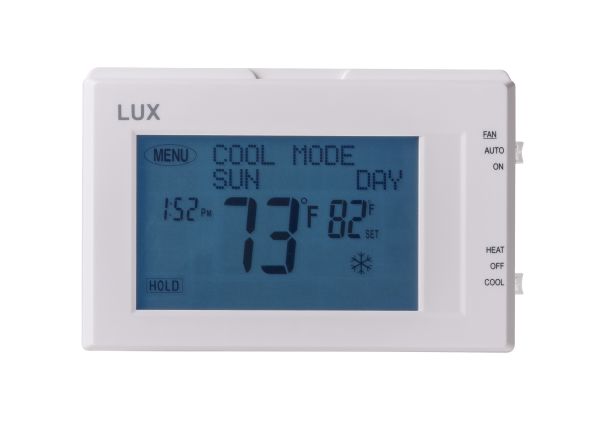
- First, verify that your thermostat is set properly. You can ensure that the system switch (which is found at the bottom right, behind the button panel door in most Lux thermostat models) is set to “heat” rather than at “cool” or “off”.
- Next, confirm that the fan switch (just to the left of the system switch in most models) is set to “auto” and not at “on”. Wait a few minutes and see if the heat kicks in.
- If the heat doesn’t kick in, or all the switches were in their correct positions, check that the temperature is actually set high enough to activate the heating. This is because, for the Lux thermostat to initiate heating, the temperature setting needs to be above the room’s ambient temperature. So use the switch and raise the thermostat’s temperature, the steps are covered earlier in this article.
- If the above steps still do not resolve your issue, it is entirely possible that your Lux thermostat has no electrical power. Replace the batteries as explained earlier in the article with two fresh AA batteries and specify a temperature to see if the heating kicks in. This won’t be necessary if the thermostat draws power from a C-Wire.
- If these steps fail, the problem may not be with your thermostat at all. Check your furnace’s gas burner or pilot light to ascertain if the issue isn’t there as well.
Flashing Flame Indicator on Lux Thermostat
In a majority of the thermostats in the market, a flashing flame symbol indicates a malfunction, where the HVAC filters may be blown, or the furnace’s pilot light might be out.
However, in the Lux thermostat models, the flame symbol, when flashing alerts you that the furnace is running, until the furnace cuts off and the flame symbol stops flashing.
It is on, when in “heating” mode and this is just normal operation with no malfunctions.
READ ALSO: How Does the EcoBee3 Power Extender Kit Work?
How to Install a Lux Thermostat
Again, this may vary on a case-by-case basis depending on your Lux thermostat model. Also, if you’re dismounting your old thermostat which might contain mercury in a sealed tube, remember to consult a recycling facility near you to properly dispose of it. Then follow the steps below to install your new Lux thermostat:
- Switch off all power from the mains terminal and detach your old thermostat from the wall. This can be done by popping off the face from the base plate and unscrewing all the wires and then unmounting the base-plate from the wall.
- Strip the wire insulation leaving about three-eighths of an inch of exposed wire and check for signs of corrosion.
- Fill in the wall-opening with non-combustible insulation. This is usually so as to prevent draughts from interfering with the thermostat’s operation.
- Pop the thermostat open. You can do this by usually pressing the thumb latch at the bottom of the unit, and separate the base-plate.
- Route the wires through the opening on the thermostat base-plate and install the mounting screws.
- Attach the wires by matching the assigned letter to each wire to the matching letter printed on the new wall plate. Ensure that the bare wire ends are held all the way in the terminal block while the screw is being tightened.
That’s it! Attach your Lux thermostat onto the wall plate and you’re done.
How to Change the Battery
If your heating/cooling systems are not kicking in, then it is entirely possible that your Lux thermostat has no electrical power. This might be evident by no text being displayed on-screen, or if the thermostat unit is slow to respond to key commands. The solution here should be to replace the batteries.
Lux thermostats use two AA batteries installed right on the back of the detachable thermostat face. Simply release the thermostat face by pressing the thumb-latch at the bottom of the unit in most models. Turn it over and you should see installed batteries which you should replace with fresh ones. Finally, replace the thermostat face and check if your issue is resolved.
Hopefully, this comprehensive guide on basic Lux thermostat troubleshooting has been helpful in getting your living situation cozy and on track again. For more complex issues, it is always advisable to reach out to technical help to avoid doing more harm than good. However, for more handiwork tips, tricks and life hacks, check out some of our other articles on the site.