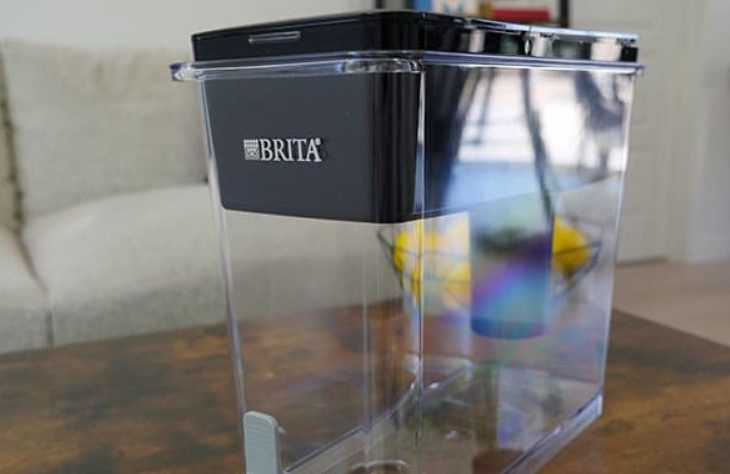
Brita Water Filter Troubleshooting
Brita water filters are among the best in the market, they can help remove substances in the water and deliver cleaner, great-tasting drinking water. If your Brita filter has issues and doesn’t seem to work as it should be, try troubleshooting it before considering other options. Some problems are simple DIY that shouldn’t cost you a lot of money and time to fix. Here is a guide on how to fix some of the common issues with these filters.
Why is My Brita Filter Not Working?
There are several possible reasons why your Brita filter is not working:
-
The filter is clogged.
Clogging can be due to airlock or any materials trapped in the filter. Hard water is another reason for filter clogging.
-
The filter has reached the end of certified life.
Brita filters have a timeline after which they will have to be replaced. The filter replacement indicator alerts you when it is time to change the filter. Sometimes you may need to replace the filter even before it reaches its end of life, especially where the water has lots of sediments.
How Do You Unclog a Brita Filter?
Filter clogging can be a big challenge, especially if your water has a lot of sediments. Unclogging your filter can help increase water flow in your system. To unclog your Brita filter, follow these steps:
- Remove the filter from the pitcher. Closely inspect the top for sediments blocking the intake vents.
- Use a toothbrush to brush away any sediment blocking the intake vents, then rinse with tap water. Insert the filter back in the pitcher and check whether the water flow has improved.
- If there is still no water flow or it is reduced, there may be minerals deposits buildup in the vents, because of your tap water. Fill half a cup of white vinegar. Put the filter into the vinegar, with the vent side down, and let it soak for about 30 minutes.
- Remove the filter from the vinegar and brush the vents using the toothbrush. Then rinse the filter and place it back in the pitcher. Fill with water to test if the flow improves. If the flow is satisfactory, fill the pitcher a couple of times to rinse the filter of the vinegar taste. Replace the filter if it is still clogged.
How Do I Know If My Brita Filter Is Bad?
One sign that your Brita filter is bad and needs to be changed is the water becoming cloudy. If you notice the filtered water is not as clear as it was before it could point to a bad filter.
The filter replacement indicator monitors the filter life and tells you when it is time to change the filter, based on your filtered water usage, assuming average water quality. The filter replacement indicator will signal the need for replacement after approximately 100 gallons. Each time you start filtering water, the indicator advances.
But, sometimes you may need to replace the filter even before you see a red indicator. This is when water flow reduces as a result of clogging due to sediments build up when there is high sediment in your water.
How Do You Activate the Brita Electronic Indicator?
To activate the indicator:
- Press the STATUS button and hold it down for 8 seconds. Red, yellow, and green lights will blink simultaneously.
- Release the STATUS button when only the green light blinks.
- Open the fill lid completely and fill the pitcher with water. Close the fill lid. If the pitcher lid is removed to fill the pitcher, place on a flat surface while filling.
- Check the filter life status at any time by pressing the STATUS button for 1 second. Light will flash green, yellow, or red depending on the filter life remaining.
Brita Filter Air Lock Filter
An airlock could the reason there is low or no water flow in your Brita filtration system, as it clogs the filter. Air bubbles can get trapped between the filter media particles and form stationary pockets of air bubbles with the filter media.
To troubleshoot filter clogging due to airlock, tap the pitcher while there is water in the reservoir to dislodge any bubbles.
How Do I Change Brita Faucet Mount Filter
Follow these steps to change your faucet filter:
- Press the filter cartridge release button located at the back of the filter cup and pull the cartridge up to remove it.
- Align the insert groove on the lower part of the cartridge with the filter replacement indicator at the front of the filter cup.
- Insert the filter cartridge into the filter cup until you hear a “click”.
- Turn on the faucet to flush the new filter for 5 minutes to remove any carbon dust and activate the filter.
Reset Brita Faucet Filter Light
The filter change indicator lets you know when it is time to change the filter. It activates when the lid is opened for 5-8 seconds and measures water use by counting the number of times the reservoir is filled. The green light will blink next to the filter you have selected, indicating a fresh filter. The red light will blink when your filter has reached the end of certified life, indicating it is time for the filter to be replaced.
When 0% of the filter life remains, the red light next to REPLACE will blink, indicating that the filter should be replaced. Replace the filter and reset the indicator as per these instructions:
- Press the STATUS button and hold it down. If you are using a standard Brita filter, hold the STATUS button down for 2 seconds, then release. All lights will blink simultaneously twice, then the green light next to the standard filter will blink three times. This indicates that the standard filter mode has been selected.
Brita Filter Indicator Not Working
If the filter replacement indicator in your Brita faucet filter does not reset with new cartridge insertion, remove the filter from the base and press the metal pin a few times until the indicator window is entirely green. Then re-insert the filter.
How Fast Does Brita Filter Water?
Brita Longlast Filters take about 15 minutes to filter the reservoir of water in your pitcher or dispenser.
Brita Faucet Filter Slow Flow
Slow flow in Brita faucet filtration systems is likely due to clogging. Even though Brita faucet filtration system replacement filters have an extra layer to reduce sediment buildup very high sediment in your water may cause the system to clog prematurely before the typical end of filter life.
If the flow rate of filtered water in your system slows, remove the system from the faucet and clean the sediment from the strainer in the mounting collar. If flow rate of filtered water remains slow, then replace filter cartridge.
Check this too: PUR Water Filter Troubleshooting and How to Guide
Brita Filter Floats Up
The reason your Brita filter floats up is because of air bubbles. Air bubbles in the filter restrict and reduce water flow, making the filter less effective. To solve this problem, try these troubleshooting instructions:
- Take the filter from the pitcher and bang it against the sink. But, don’t bang it too hard so that you don’t end up damaging it.
- Put the filter in the water. It should sink now.
- Place the filter back in the pitcher. The flow rate should have improved.
How to Change Brita Filter Water Bottle
For your Brita water bottle, it is recommended you replace filters every 40 gallons or every two months whichever comes first. To change the filter in your Brita water bottle, follow these instructions:
-
Sport Bottles
- Remove the filter from the filter housing.
- Push new filter firmly into the housing.
- Unscrew the cap and fill the bottle with cold tap water. Tighten the cap firmly.
- Squeeze one full bottle of water through the filter to activate before use.
-
Hard-Sided Bottles
- Rinse your Brita bottle filter under running water for about 15 seconds.
- Place new filter into housing and press down firmly until the filter is flush with straw.
- Align lid and straw in the unlocked position, the rotate straw to unlock.