Dometic Thermostat Troubleshooting Guide
A faulty thermostat could mean cold winters or sweaty hot summers, both of which are greatly unfavorable conditions that could have an adverse effect on human health. This is why we have created this Dometic thermostat troubleshooting guide to ensure that you have control over your heating and cooling system when you need it most.
If you are camping and you need an RV thermostat troubleshooting guide, read on for an insight into whichever problem you are facing with your Dometic RV thermostat and the best solutions.
So how do you troubleshoot a Dometic thermostat? Well, that depends on the issues you are facing. Here is a detailed guide for solving almost any problem you will encounter with a thermostat from one of the best thermostat brands.
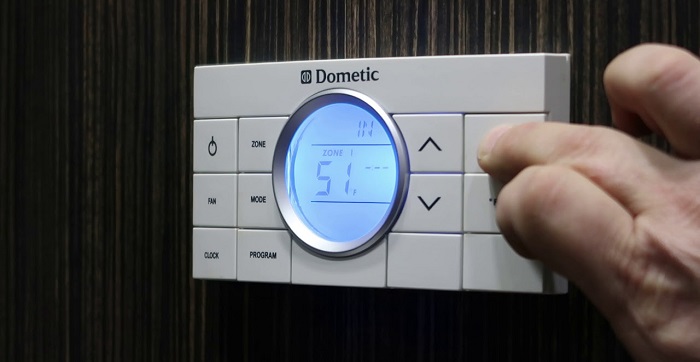
How to Program a Dometic Thermostat
It is important to know your temperature control requirements before programming your Dometic thermostat. Keep in mind that a thermostat may come with preset heating and cooling modes and all you need is to match the preset modes to your temperature schedule. Follow the steps below to create a table with temperature control requirements for your home.
- Write down a column list of days of the week for each season.
- Write a row list of the hours of the day.
- Under each day write the temperature needs by the hour.
- Shorten the hours with the same temperature needs into one period. For example, if you require 79°F between 9 AM to 5 PM, then call that “daytime.” Your table should now have fewer rows.
Alternatively, you may use the default temperature modes on the thermostat for regular heating and cooling. Some thermostats from Dometic have Low and High cooling modes and Low and High heating modes.
With the above information, you are now ready to program your Dometic thermostat. Always consult the manual for instructions on how to program the specific model of thermostat that you have. Generally, the procedure is similar to many Dometic thermostats, with a few differences. Below is a step-by-step procedure to program your Dometic thermostat.
Setting the Time and Date
- First set the time and date by pressing the Clock button.
- Press the up and down arrow keys to set the correct hour, then press the Time button followed by the up and down arrow keys to set the correct Minute.
- Press the Time button to select the day of the week, followed by the arrow keys to select the correct day.
- Press the Run button to save the settings.
Setting the Heating Cycle
- Press the “Mode” button to select the “Heat Cycle”.
- Press and hold the Menu button for five seconds. The Schedule options appear.
- Press the Schedule button to select the heating period.
- Press the up or down arrow to adjust the temperature for this heating period.
- Press the Time button, then press the up and down arrow keys to select the start time for the heating period.
- Press the Schedule button to go to the second heating period, and then follow steps (d) and (e) to set the temperature and time.
Setting the Cooling Cycle
To set the cooling cycle to follow the steps in the heating cycle but exchange the “Heat cycle” with the “Cooling cycle” in step (a) above.
The above steps are applicable even if you have more heating and cooling periods within the day. Simply repeat the “Heating” and “Cooling” cycle procedures to set the appropriate temperature control for each period.
For ease of use, Dometic has included a preset schedule that is activated when you set the time and date, then press the Run button. If you get stuck, consult your Dometic product manual for operating instructions.
How to Reset a Dometic Thermostat
You may need to reset a Dometic thermostat occasionally to change the temperature control. For example, weather patterns may change necessitating a change in the heating and cooling schedule. Resetting a Dometic thermostat returns it to the out-of-the-box state or factory default.
READ ALSO: Carrier Thermostat Troubleshooting
To reset it, press the up, down and time buttons at the same time. You may refer to the section above on how to program a Dometic thermostat for configuration instructions. To reset the Dometic, follow the steps below:
- Ensure main power is switched on
- Ensure power to the thermostat is switched on
- Ensure the thermostat mode is “”
- Press and hold the “Mode” and “Zone” buttons until it displays “iNit”. Release the buttons.
- Press the “On/Off” buttons.
It is recommended to re-program the Dometic thermostat immediately after resetting to preserve its working life. If the thermostat were to default to a temperature control mode that is opposite the current requirement, it would overwork itself and consume unnecessary power.
How to Fix a Dometic Thermostat That Won’t Turn On
- To fix a thermostat that won’t turn on, follow the steps below:
- Ensure the main power is switched on
- Ensure power to the thermostat is switched on
- Reset the thermostat circuit breaker
If the thermostat comes on but does not provide temperature control, switch it to a lower temperature than its operating temperature. Allow ten minutes and turn it back on to the previous temperature.
If the steps above do not work, reset the thermostat according to its instruction manual.
Switch off power and check the wiring.
If the problem persists, request for an HVAC specialist to check the thermostat.
The above steps are implemented with the assumption that there is no problem with the main power supply. You should carry out some basic power supply checks to ensure power supply is available and is the correct source (i.e., AC or DC power).
How to Change Dometic Thermostat Readings from Celsius to Fahrenheit
Each thermostat may have its unique way of changing the temperature reading from Celsius to Fahrenheit. However, it is fairly easy to adjust this setting by looking for a button with “C/F” on the thermostat front panel.
If you do not find this setting, select the “Settings” option and scroll down with the up and down arrow keys until you find an option to adjust temperature reading units.
How to Wire Your Dometic Thermostat
It is critical to consult your thermostat manual for instructions for Dometic thermostat wiring. Wrong wiring could lead to excessive power consumption, thermostat damage and other undesirable effects.
Ensure you have the tools and equipment needed to carry our wiring before starting the process. There are different instructions for wiring different types of thermostats. For example, a single zone thermostat is wired differently from a dual zone thermostat. Once, you have determined what type of wiring is appropriate for your thermostat; you can then proceed to wire.
Dometic Thermostat Errors and Their Fixes
Here are some of the errors you may experience while using your Dometic thermostat and how to fix them.
E1 Error Code: What Does It Mean and How to Fix
An E1 error code could mean the Dometic thermostat has lost connection to one or more of the power circuit panels. To clear this error, try the following workarounds:
- Reset the thermostat Dometic thermostat. Check to see if it works.
- Reset the Dometic power fuse. If this does not resolve the problem, proceed to the next step.
- Switch off and on the main power circuit breakers.
If none of the above steps clear the error, you should have an AC specialist check on it.
Error Code E4
The E4 error code is caused by a malfunction in the heat pump’s operation. To clear this error, ensure the wire cables connecting to the Dometic thermostat control panel are not worn out and replace any worn-out cables.
Error Code E2
An E2 error code is caused by a disconnection on the indoor heat sensor. To clear this error, ensure the wires connecting to the heat sensor are replaced if worn out.
Error Code E7
The E7 error code appears when there is a power loss to the entire unit. Check the main power source to ensure there is power. Check wiring to ensure none of the wires is faulty. If these steps do not work, consult an AC specialist.
Error Code E5
The E5 error means the connection to the Freezer sensor is lost. A common cause of this problem is poor wiring. To clear these error codes, replace all worn out cables that connect to the Freezer sensor. If you are not in a position to do the replacement, consult an AC specialist.
It is important to follow proper Dometic thermostat troubleshooting instructions to enjoy the benefits of a properly functioning thermostat. The above instructions are a basic guide to be used alongside the manual of your specific Dometic thermostat whether it is a home thermostat or an RV thermostat. While it may be possible to take up a replacement of an older Dometic thermostat as a do-it-yourself project, it is better to accompany an AC specialist during a first-time replacement to avoid damaging the thermostat. This will also ensure you get a longer functional life out of your thermostat.
It is noteworthy that an RV thermostat has DC power options which means you will have to wire it differently. However, basic operation remains the same and should be easier when consulting the owner’s manual.